Property Damage Insurance Claims Process: 7 Proven Winning Steps 2025
What Is the Property Damage Insurance Claims Process?
The property damage insurance claims processis a series of steps you take to get financial help from your insurer after your home or business suffers damage from storms, fire, water, or other covered events.
Here’s exactly what the process looks like, step-by-step:
- Secure the area and prevent further damage.Safety first. Take steps like turning off utilities or tarping a roof.
- Document everything.Take photos, videos, and make a list of all damage and losses. Keep receipts for any emergency repairs.
- Notify your insurance company.Call their 24-hour hotline or use an online portal to start your claim and get a claim number.
- Meet with the insurance adjuster.An adjuster will visit (sometimes virtually) to inspect the damage and ask questions.
- Review estimates and settlement offers.Compare the insurer’s estimate to bids from contractors. Negotiate if needed.
- Complete repairs and submit final paperwork.Get the work done, collect receipts, and close your claim.
- Get your payment.The insurer issues funds for repairs—sometimes in stages—and may include your mortgage lender as a co-payee.
“Property damage can be devastatingly stressful… understanding how to file an insurance claim is key for making the process go more smoothly and receiving fair compensation for repairs.”
This guide is here to walk you through every stage, cut through the jargon, and help you avoid costly mistakes. Whether you’re a homeowner or a business owner, mastering these steps is the fastest way to get back to normal.
Must-knowproperty damage insurance claims processterms:
- bodily injury property damage
- can i settle bodily injury claim with property damage pending
- property damage claims resolution
Know Your Claim: What Counts as Property Damage & When to File
Before disaster strikes, you need to understand what your insurance policy actually covers—and more importantly, what it doesn’t. This knowledge can save you thousands of dollars and weeks of frustration during theproperty damage insurance claims process.
Most homeowner policies covertheft, fire, smoke, wind, hail, lightning, and certain types ofwater damage from burst pipes or internal plumbing issues. Business property insurance typically covers these same perils, plusbusiness income coveragewhen you can’t operate normally.
But standard policies excludefloods, earthquakes, sewage backups, sinkholes, renovation damage, pest infestations, andwear and tear. If you live somewhere that floods regularly or sits on a fault line, you’ll need separate coverage for those risks.
The key question isn’t just “Is this covered?” It’s “Should I even file a claim?” Insurance claims work best for major damage, not every little scratch and dent. Consider yourdeductible(usually between $300 and $1,000 for home insurance) and how filing might affect your future premiums.
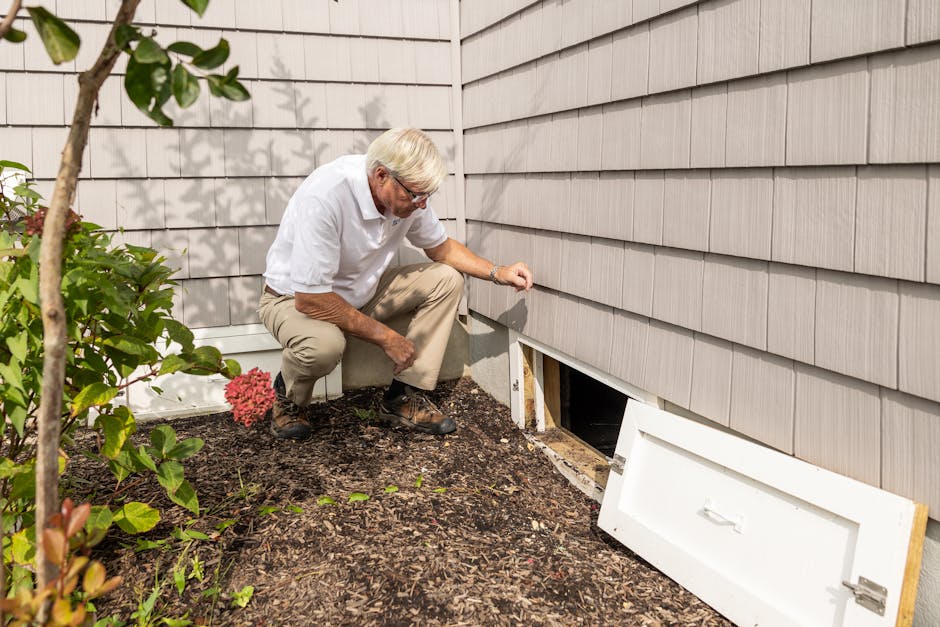
Emergency safety measuresare different. If your roof gets torn off in a storm, you can’t wait for approval—tarp it immediately to prevent further damage. Your policy likely covers these temporary protective steps, but keep those receipts.
Filing Clock & Legal Deadlines
Time limits are real, and they’re not negotiable. Most insurance policies give you justone year from the date of lossto file your claim. Miss that window, and you could be out of luck entirely.
In Texas, property owners gettwo yearsunder Texas Civil Practice and Remedies Code §16.003. But many policies include“suit limitation clauses”that can shrink this window down to just one year.
The golden rule?Report damage as soon as it’s safe to do so. Fresh evidence is strong evidence. Waiting months to file makes it harder to prove what happened and when.
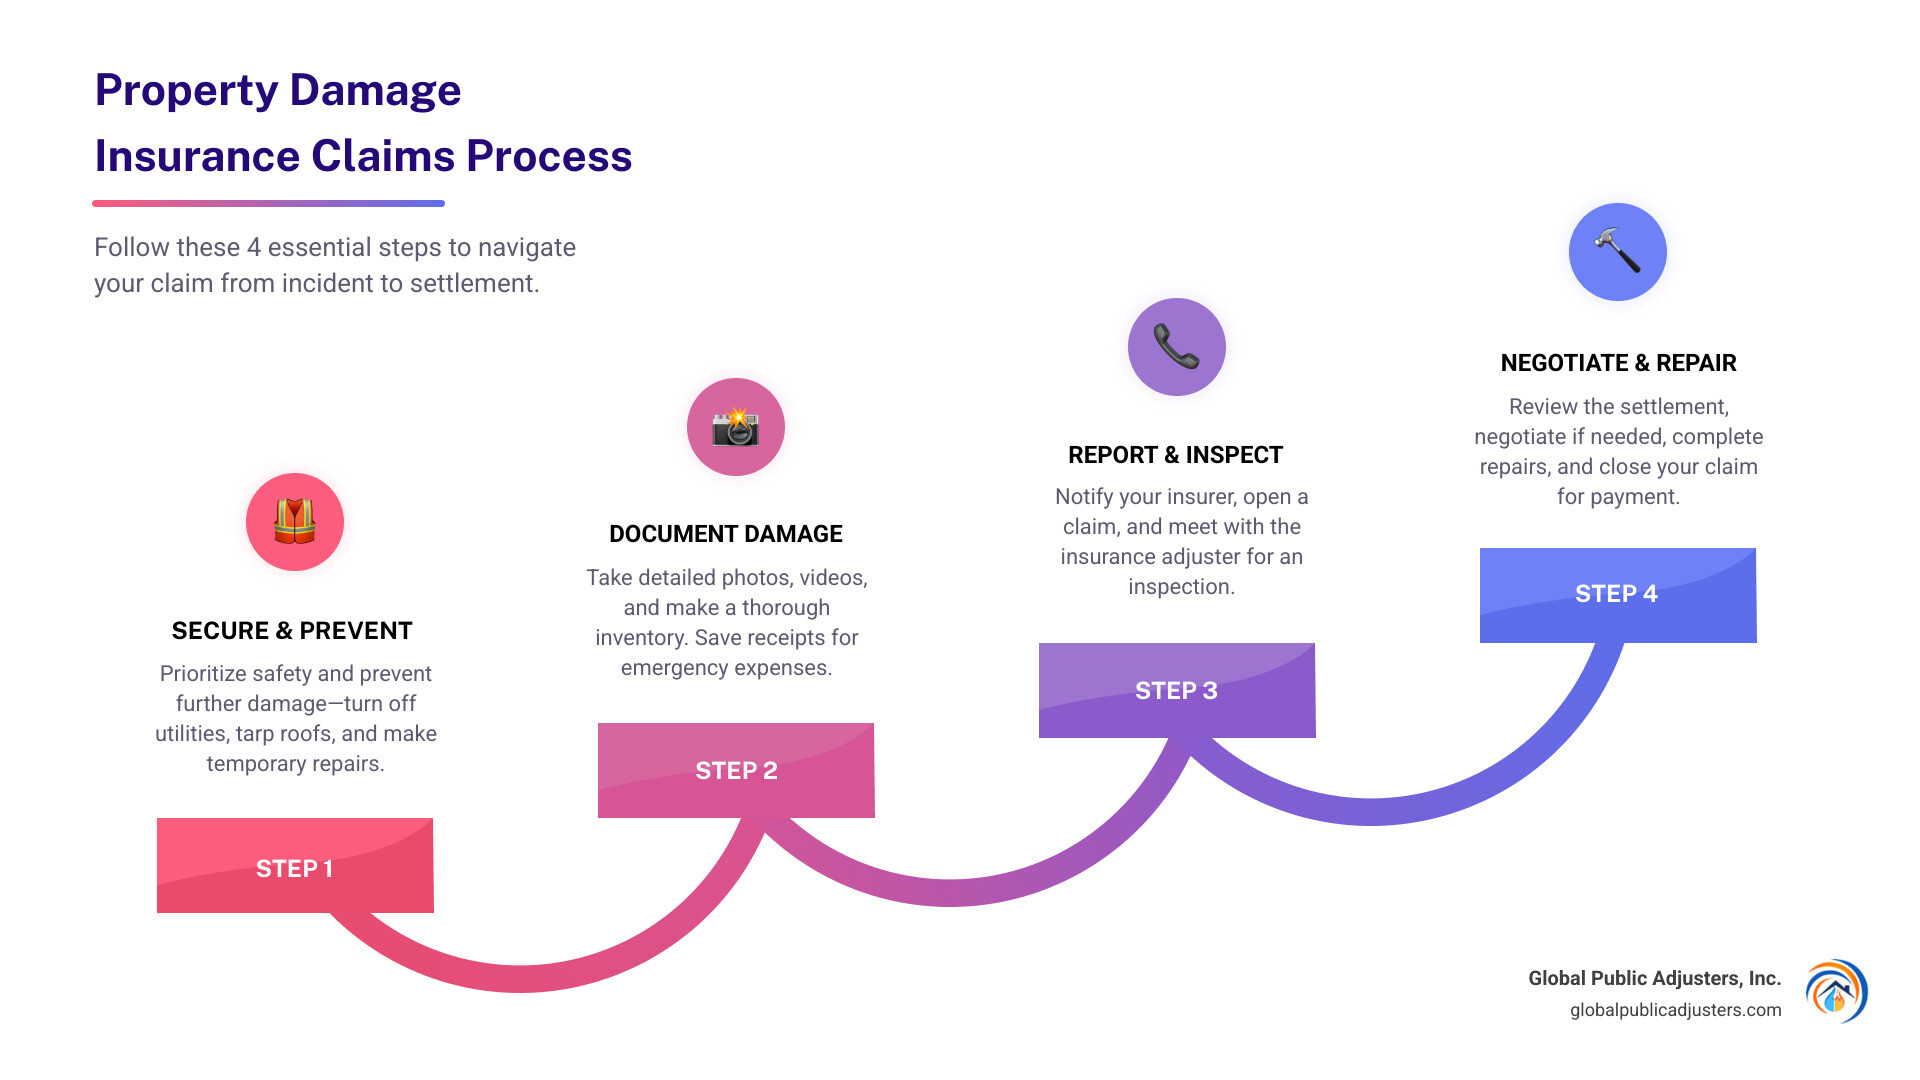
The Property Damage Insurance Claims Process Step-by-Step
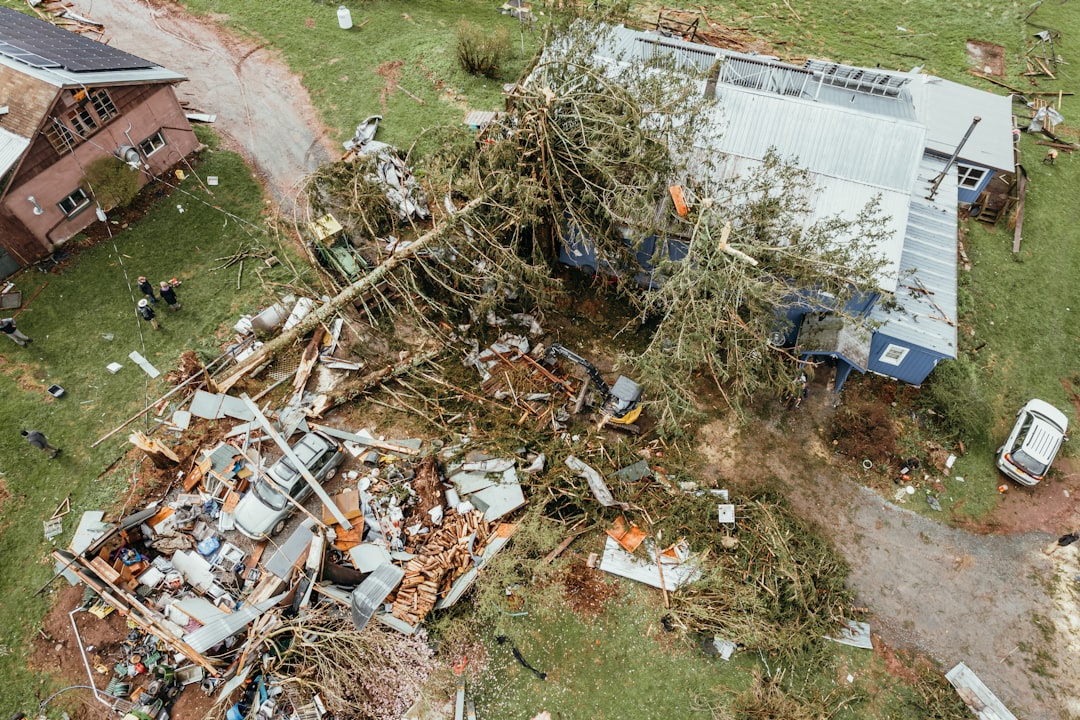
When disaster strikes, knowing exactly what to do next can mean the difference between a smooth settlement and months of frustration.The property damage insurance claims processtypically takes between 120 and 180 days, sometimes longer during busy seasons like hurricane aftermath.
Step 1 – Safety First & Loss Mitigation
Before calling your insurance company,make sure everyone is safe. If there are injuries, call 911 immediately. If your home has structural damage—sagging ceilings, cracked walls, or broken support beams—evacuate until a professional says it’s safe.
Next, prevent your property from getting worse through “loss mitigation”:
Turn off utilitiesif there’s water damage.Cover broken windowsor holes in the roof with tarps.Move undamaged itemsto dry areas. Set up fans and dehumidifiers if available.
Keep every receipt for emergency repairs. Your insurer should reimburse reasonable mitigation costs. Butdon’t make permanent repairsuntil after the adjuster inspection.
Step 2 – Document Like a Pro
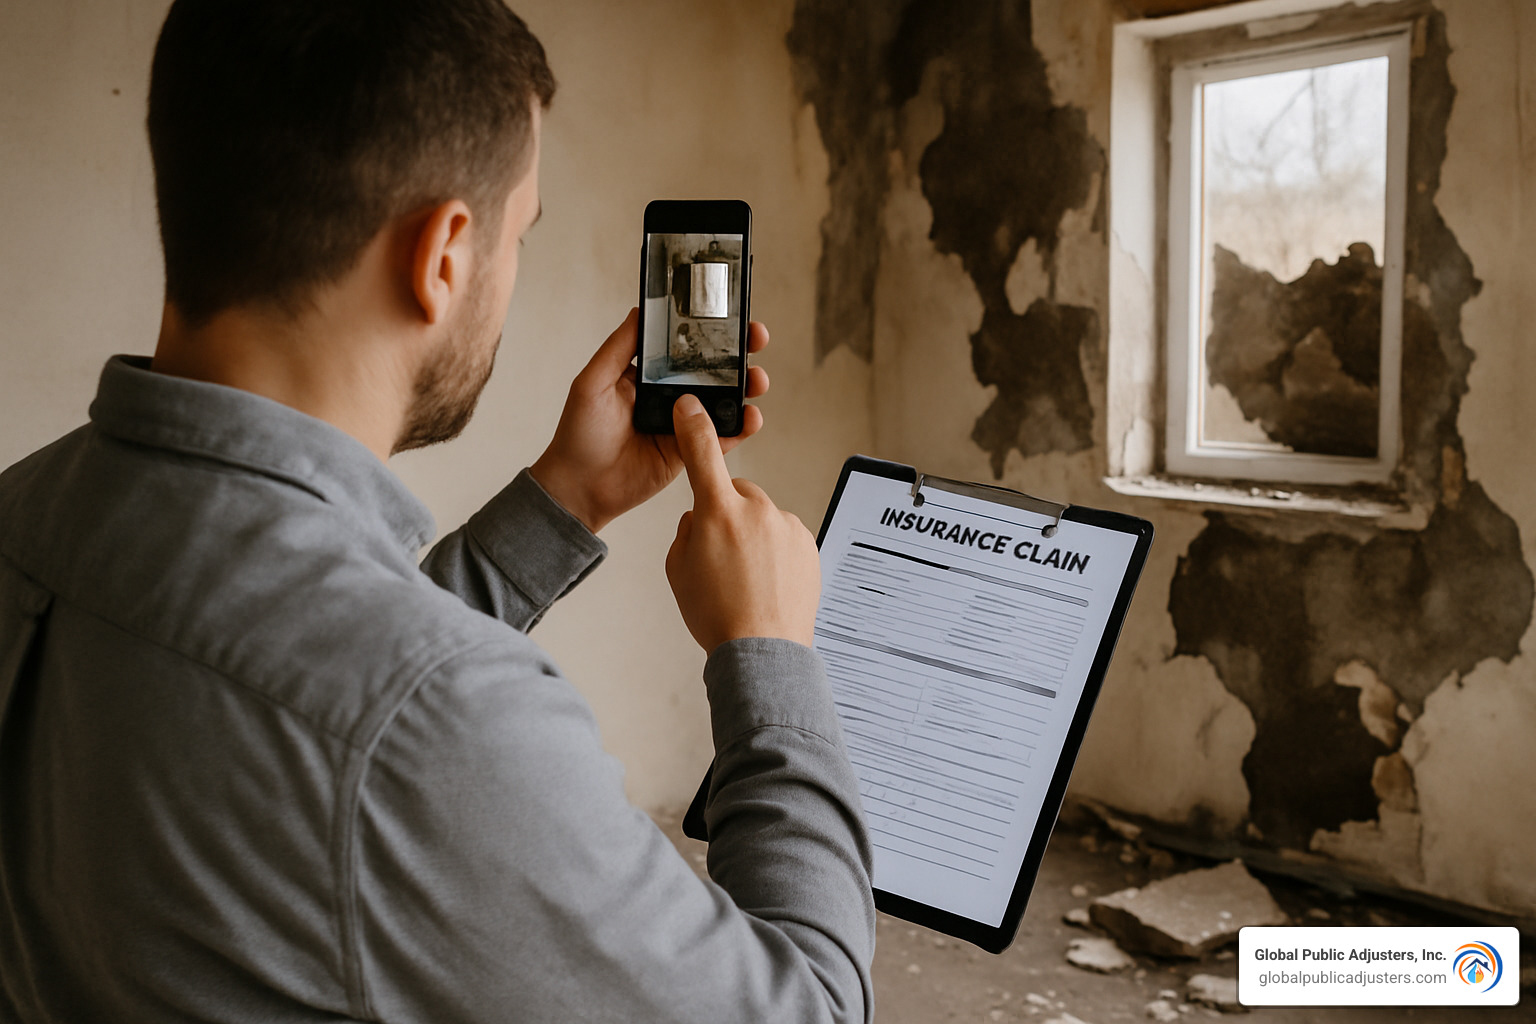
Poor documentation is one of the biggest reasons claims get denied or underpaid.
Start with photos and videosof everything. Take wide shots showing overall damage, then close-ups of specific problems. Include something for scale. Photograph undamaged areas too—this shows what your property looked like before the incident.
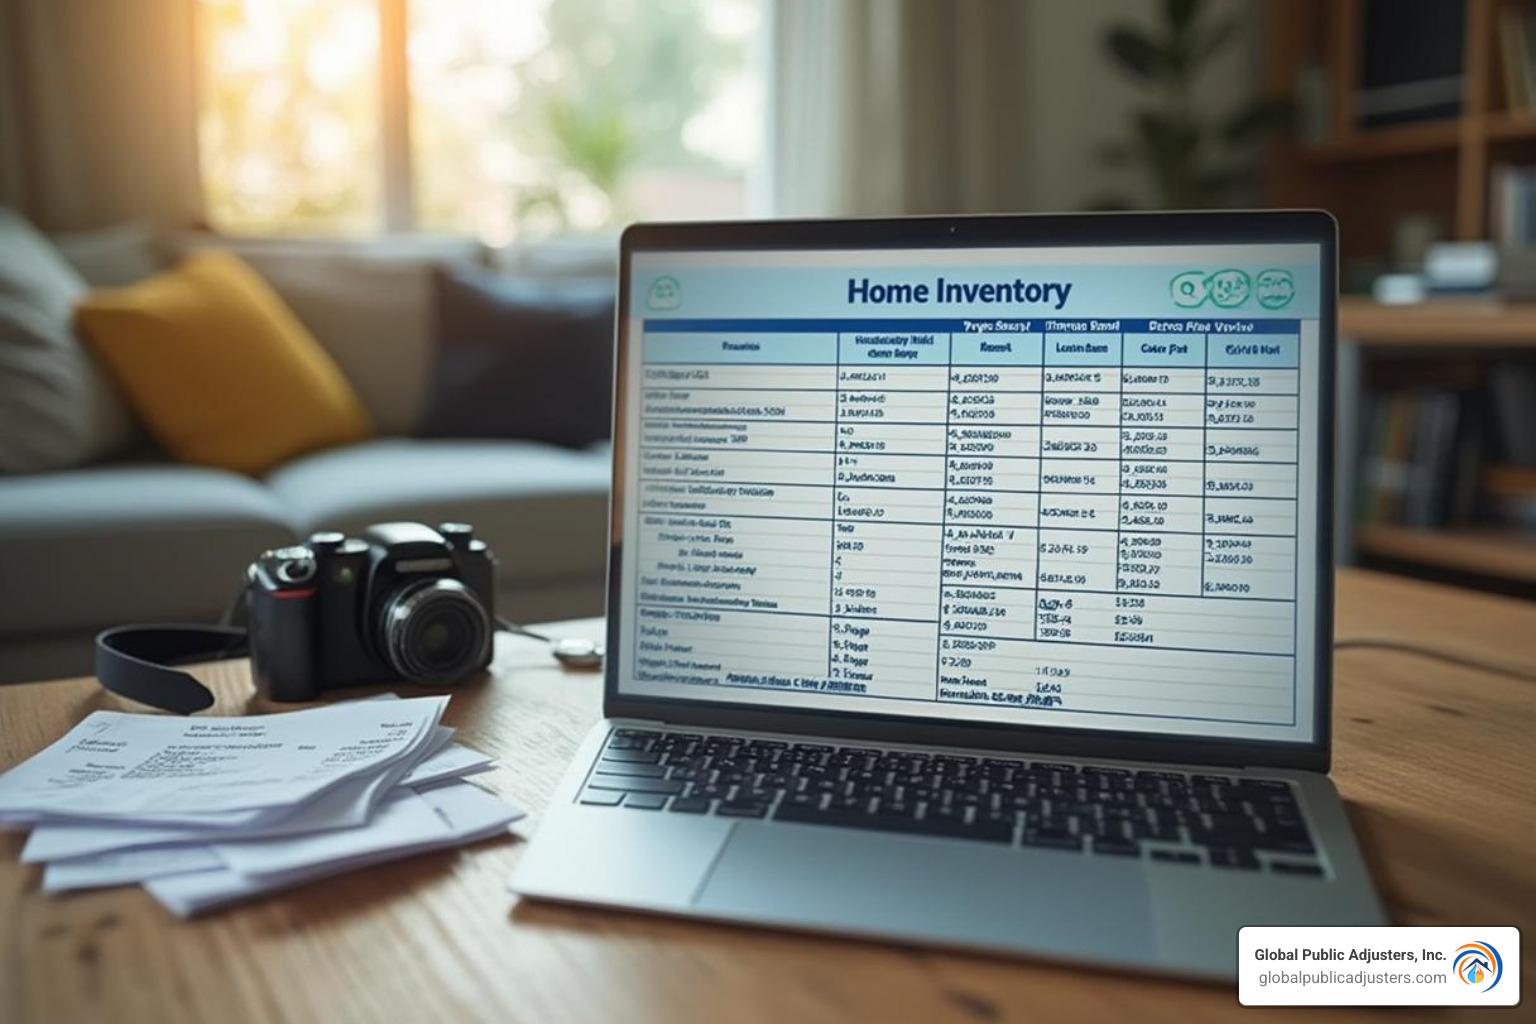
Create a detailed written inventoryof every damaged, destroyed, or stolen item. Include purchase dates, prices, and serial numbers when available.
Write down exactly what happened and when. Keep notes on every conversation with your insurance company, including dates, times, and who you spoke with.

Don’t throw anything awayuntil your insurer gives written permission.
Step 3 – Report & Open Your Claim
Most insurance companies offer 24-hour claims hotlines. Have your policy number ready and be prepared to provide contact information, the date and time of damage, and a detailed description of what happened.
Many insurers now have online portals and mobile apps for starting claims directly from your phone. You can upload photos and documents immediately, which speeds up the process.
Write down your claim numberimmediately. Reference it in every conversation, email, and document.
Step 4 – Meet the Adjuster & Understand Their Role
Within a few days, your insurance company will assign an adjuster to investigate.Carrier adjusterswork directly for your insurance company, whileindependent adjustersare contractors hired by your insurer. Both work for the insurance company, not for you.
The adjuster investigates what caused the damage, reviews your policy coverage, estimates repair costs, and recommends a settlement amount.
Be present during the inspectionand available to answer questions. Provide all documentation and point out damage that might not be obvious. Take notes on what the adjuster says and does.
Step 5 – Review Estimates & Negotiate Settlement
After inspection, the adjuster prepares a report and your insurance company makes a settlement offer. This initial payment is often based onactual cash value(depreciated amount), not full replacement cost.
Get your own repair estimatesfrom licensed contractors. We recommend getting at least two or three bids to compare with the insurer’s estimate.
Your settlement might come as multiple checks for different categories: structure repairs, personal property replacement, and additional living expenses.
Don’t be afraid to negotiateif you think the settlement is too low. Insurance companies expect some back-and-forth.
Step 6 – Complete Repairs & Close the File
Once you’ve agreed on a settlement, begin permanent repairs. Keep detailed records of all work and expenses. If contractors find additional damage during repairs, contact your adjuster immediately.
Before final payment, you’ll need invoices and receipts for all work, lien waivers from contractors, photos of completed repairs, and warranty documentation.
Money Matters: Deductibles, Valuation & Payout Mechanics
Let’s talk about the money side of theproperty damage insurance claims process—because understanding how insurers calculate payouts can be the difference between getting fairly compensated and leaving thousands on the table.
Most home insurance deductibles sit between$300 and $1,000, but here’s where it gets tricky: wind and hail claims often carry higher deductibles. Instead of a flat dollar amount, these might be calculated as a percentage of your dwelling coverage. So if your home is insured for $200,000 and you have a 2% wind deductible, you’re looking at $4,000 out of pocket—not the $500 you might expect.
The biggest surprise for many homeowners?You don’t write a check to your insurance company for your deductible.Instead, they simply subtract it from your settlement. If you have $15,000 in damage and a $1,000 deductible, your insurer cuts you a check for $14,000.
Understanding how your policy pays outis crucial. There are two main approaches, and they work very differently:
| Actual Cash Value (ACV) | Replacement Cost Value (RCV) |
|---|---|
| Current worth after depreciation | Full cost to replace with new |
| Lower payout initially | Higher payout potential |
| No proof of purchase required | Must actually replace items |
| Faster settlement | Two-step payment process |
WithActual Cash Value, you get what your damaged items were worth at the time of loss—not what you originally paid. That 10-year-old roof? It’s worth a lot less than when it was new.Replacement Cost Valuepays the full amount to replace items with new ones, but there’s a catch: you usually have to actually make the repairs or replacements to get the full amount.
How Insurers Calculate Your Settlement
Insurance companies don’t just pull numbers out of thin air—they use sophisticated methods to estimate costs. For structural damage, they often rely onsquare-foot pricingbased on local construction costs. For your personal belongings, they use software that tracks current retail prices for similar items.
The adjuster considers several factors when calculating your settlement.Age and conditionof damaged items play a huge role—that brand-new laptop gets valued differently than one that’s been around for five years.Local labor and material costsvary significantly by region, so a roof replacement in Manhattan costs more than the same job in rural Kansas.
Building codes can also affect your payout. If your damaged home needs to be brought up to current code standards, that’s additional cost the insurer should cover.Permit requirementsand inspection fees are typically included in settlement calculations too.
Scientific research on claim estimationreveals something important: initial estimates often come in low. This is exactly why getting your own contractor estimates is so valuable—it gives you leverage to negotiate a fair settlement.
Deductibles Explained—When & How You Pay
Here’s something that confuses many people:not all deductibles are created equal.Your policy might have different deductibles for different types of damage.
Yourstandard deductibleapplies to most covered losses like fire, theft, or burst pipes. Butwind and hail deductiblesare often much higher—sometimes 1% to 5% of your dwelling coverage amount. If your home is insured for $300,000 and you have a 2% wind deductible, you’re responsible for the first $6,000 of damage.
Hurricane deductiblesare triggered when the National Weather Service officially declares a hurricane. These can be substantial—often ranging from 2% to 10% of your dwelling coverage, depending on your location and policy.
The timing matters too. You pay your deductible once per claim, not per damaged item. So if the same storm damages your roof, breaks your windows, and floods your basement, you only pay one deductible for the entire claim.
Mortgage Lender & Escrow Basics
If you have a mortgage, your lender becomes part of theproperty damage insurance claims processwhether you like it or not. They have a financial interest in making sure repairs get done properly, which is whydual-payee checksare so common for structural damage claims.
Here’s how it typically works: your insurance company issues a check made out to both you and your mortgage lender. You can’t just deposit it yourself—the lender has to endorse it too. Some lenders will sign the check right back to you, especially for smaller amounts. Others will hold the money in escrow and release it as repairs progress.
Theescrow processcan feel frustrating, but it’s designed to protect everyone involved. You submit invoices and proof of completed work to your lender, who then releases funds from the insurance settlement. Many lenders chargeinspection draw fees—typically around $60 per inspection—to verify work is being done properly.
Additional Living Expenses (ALE)coverage works differently. If you can’t live in your home during repairs, your policy may cover hotel bills, restaurant meals, and other extra costs. These payments usually go directly to you since they’re for immediate needs, not permanent repairs.
The whole process moves faster when you understand these mechanics upfront. Multiple checks for different categories—structure repairs, personal property, and living expenses—are normal, not a sign that something’s wrong with your claim.
Overcoming Roadblocks: Denials, Disputes & Supplemental Claims

Not everyproperty damage insurance claims processgoes smoothly. Sometimes insurers deny claims or offer settlements that seem unfairly low. Most roadblocks have solutions if you know how to steer them properly.
Insurance companies deny claims for predictable reasons:unpaid premiums,late filing,uncovered perils,policy exclusions,misleading statements,lack of documentation,pre-existing damage, andfailure to mitigate further loss.
When disputes arise, you have several options: theappeals process,proof-of-lossforms, your policy’sappraisal clause,mediation, andlitigationwhen insurers act in bad faith.
What to Do If Your Property Damage Insurance Claim Is Denied
Getting a denial letter feels devastating, but denials aren’t always final.
Start bycarefully reading the denial letterto understand exactly why your claim was rejected. Different denial types have different solutions.
When denial citesexcluded perils, don’t give up immediately. Coverage sometimes exists under sections you wouldn’t expect.
Insufficient documentationis often the easiest denial to overturn. Gather additional evidence like receipts, photos, witness statements, or expert reports. Request toreopen your claimwith this new information.
Forpre-existing damagedenials, focus on proving the timeline. Gather evidence showing the damage occurred during the covered event, not before.
If internal appeals don’t work,file a complaintwith your state insurance department. These agencies investigate consumer complaints and can pressure insurers to reconsider unfair denials.
Supplemental & Additional Damage After Repairs
Hidden damageis incredibly common, especially with water-related claims. What looks like surface damage often extends into wall cavities, subflooring, or structural elements not visible until repairs begin.
The key to getting supplemental payments isprompt notification. As soon as your contractor finds additional damage, contact your adjuster immediately.
Submitting new estimatesfor supplemental damage follows the same process as your original claim. Document everything with photos, get written estimates from licensed contractors, and explain how the new damage relates to your original loss.
Most policies allow you toreopen closed claimsif you find additional damage within a reasonable timeframe—typically one to two years.
Preparation & Prevention: Build an Ironclad Property Inventory
Creating a property inventory is like buying insurance for your insurance claim. Most people can’t remember everything they own when stressed and dealing with property damage.
Digital storage is your best friend. Cloud-based storage means your inventory survives even if your computer doesn’t. Update your inventory at least once a year and after major purchases. Include serial numbers, model numbers, and purchase dates whenever possible.
Don’t forgetphysical preparation. Keep copies of important documents in a waterproof, fireproof safe, and store backup copies off-site. Practice emergency evacuation plans and know where your utility shut-offs are located.
DIY Inventory Checklist
Goroom by roomthrough your home or business. For each item, record the description, brand, model, and serial number when available. Note the purchase date and original price, then estimate current value.
Documentation is everything. Take clear photos of valuable items and keep digital copies of receipts and warranties.
Pay special attention tohigh-value itemslike jewelry, artwork, collectibles, or specialized business equipment. These often have coverage limits under standard policies.
Serial numbers are particularly important for electronics, appliances, and tools. They help prove ownership and prevent disputes about age or model of damaged items.
Temporary Repairs vs. Permanent Fixes
Temporary repairsare emergency measures to prevent further damage—like tarping a damaged roof, boarding up broken windows, or turning off water to stop flooding. These aren’t just allowed; they’re required.
Permanent repairsshould generally wait until after the adjuster’s inspection, unless the damage creates an immediate safety hazard.
Your insurer should cover reasonable costs for temporary mitigation, including materials for emergency repairs, professional services like water extraction, temporary accommodations if your home becomes uninhabitable, and storage costs for items you need to move.
Keep every receipt for mitigation work. If you’re unsure whether a repair counts as temporary or permanent, call your adjuster before proceeding.
Frequently Asked Questions about the Property Damage Insurance Claims Process
Let’s tackle the questions we hear most often aboutthe property damage insurance claims process. These are the real concerns that keep homeowners and business owners up at night after disaster strikes.
How long does the average claim take from start to finish?
Here’s the honest answer: it depends on a lot of factors, but you’re looking at60 to 180 daysfor most claims from start to finish. Simple claims with clear documentation and straightforward damage can wrap up in about two months once your insurer has all the paperwork they need.
But complex claims? Those can stretch much longer. If you’re dealing with extensive structural damage, disputes over coverage, or filing duringsurge seasons(like hurricane aftermath), expect the process to take four to six months or more.
The investigation phase alone can eat up several months for complicated losses. During busy periods when adjusters are swamped with claims, everything slows down. It’s frustrating, but understanding this timeline helps you plan better and set realistic expectations.
What’s the difference between an insurance adjuster and a public adjuster?
This is where things get interesting, and frankly, where many people get confused about who’s actually on their side.
Insurance adjusters work for the insurance company.They’re paid by your insurer to investigate claims and determine how much the company should pay. They’re trained professionals, but their loyalty is to their employer—the insurance company. Their job is to be fair, but also to protect the company’s financial interests.
Public adjusters work for you.They’re licensed professionals who advocate exclusively for policyholders. Instead of getting a salary from an insurance company, they charge a fee (typically 10-20% of your settlement) that comes out of your final payout.
Think of it this way: if you were going to court, would you want the other side’s lawyer representing you? That’s essentially what happens when you rely solely on the insurance company’s adjuster to handle your claim.
Public adjusters can be especially valuable for large or complex claims where the stakes are high. They know the ins and outs of policy language, can spot coverage you might miss, and aren’t afraid to push back when insurers lowball settlements.
Can I choose my own contractor instead of the insurer’s preferred vendor?
Absolutely, yes.You have every right to choose any licensed contractor you want, and don’t let anyone tell you otherwise. This is your property and your claim.
Insurance companies often push theirpreferred vendor networks, claiming it will speed up the process or guarantee better results. While their contractors might be perfectly competent, these vendors have ongoing relationships with the insurance company. They know which estimates get approved quickly and which ones cause headaches.
The trade-off is simple: if your chosen contractor’s estimate is higher than what the insurer wants to pay, you’ll typically need to cover the difference out of pocket. But many homeowners find that paying a bit extra for a contractor they trust is worth the peace of mind.
Just make sure whoever you choose is properly licensed, insured, and has solid references. Get everything in writing, and don’t pay large sums upfront. A good contractor understands the insurance process and can work with you to document any additional damage they find during repairs.
Conclusion
You now have the complete roadmap for navigatingthe property damage insurance claims process. The difference between a successful claim and a frustrating one often comes down to three things:good documentation, understanding your timeline, and knowing when to ask for help.
Take photos of everything, keep your receipts, and don’t let deadlines sneak up on you. Insurance companies are businesses first—they’re not trying to be unfair, but they are trying to manage costs. When you understand how the process works and what your rights are, you’re in a much better position to get the settlement you deserve.
The most important thing?Don’t try to handle everything yourself if the claim gets complicated. A kitchen fire with $5,000 in damage is manageable. A hurricane that destroys half your roof and floods your business requires professional help.
At Global Public Adjusters, Inc., we’ve been helping homeowners and business owners in Orlando, Pensacola, and throughout Florida for over 50 years. We’ve seen every trick in the book—and we know how to fight back when insurance companies try to lowball settlements or drag out the process.
Nobody plans to need a public adjuster, but when disaster strikes, having someone in your corner who speaks the insurance company’s language can make all the difference. We work on contingency, so we only get paid when you do.
Here’s hoping you never need to use this guide.But if you do, you’re now equipped with the knowledge to protect yourself and get back on your feet as quickly as possible. When it comes to insurance claims, being prepared isn’t paranoid—it’s smart.